Search the Community
Showing results for tags 'Combat Mission'.
Found 12 results
-
Finally returning to the beaches and bocage fields of Normandy, France, the first installment in this new Combat Mission series, titled Battle for Normandy, is upon us and covers the three months after the Allied D-Day landings in June 1944, from Operation Overlord through to Cobra Breakout in August. US and German Army formations, equipment, and vehicles have been exquisitely researched, and care has been taken to adeptly replicate the whole atmosphere of the location and circumstances by featuring detailed rural and urban landscapes, as well as implementing realistic weather effects. To get a true measure of what this freshly released tactical land warfare simulation has to offer you might well want to check out the plump demo, or start with the juicy 200-page manual which can be perused online here. Currently available for PC and Mac in both boxed and digital download formats exclusively through Battlefront.com
-
Combat Mission: Battle for Normandy We knew they'd get around to it. The folks over at Battlefront.com had already teased it and now they're crossing yet another bridge to deliver in full the intel regarding the upcoming new module for Combat Mission Battle for Normandy - Market Garden. http://www.strategycore.co.uk/site/assets/files/6375/news-thumbnail_combat_mission_battle_normandy_market_garden_mdl_scr01.jpg http://www.strategycore.co.uk/site/assets/files/6375/news-thumbnail_combat_mission_battle_normandy_market_garden_mdl_scr02.jpg http://www.strategycore.co.uk/site/assets/files/6375/news-thumbnail_combat_mission_battle_normandy_market_garden_mdl_scr03.jpg The features abridged: For further information about the campaigns and the features visit the official site. The base game (upgraded to version 2.0) is required in order to be able to play this new expansion. Market Garden is currenlty in beta and traversal to retail is currently scheduled for "later this summer".
-
Combat Mission: Battle for Normandy Battlefront.com wants you warring at another level. If you own Combat Mission: Battle for Normandy then you might well want to upgrade the tactical world War II ground warfare simulation to v2.0. http://www.strategycore.co.uk/site/assets/files/5576/news-thumbnail_combat_mission_battle_normandy_v2_0_scr01.jpg http://www.strategycore.co.uk/site/assets/files/5576/news-thumbnail_combat_mission_battle_normandy_v2_0_scr02.jpg http://www.strategycore.co.uk/site/assets/files/5576/news-thumbnail_combat_mission_battle_normandy_v2_0_scr03.jpg It's important to note that this is not a simple version stepping or a patch but a paid upgrade that adds new features and improvements, such as: For a full rundown of the benefits check out the dedicated page here. We learned also that Combat Mission: Battle for Normandy v1.0 is enjoying a special sale which makes it appealing to pick up the base game at this time.
-
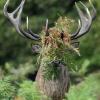
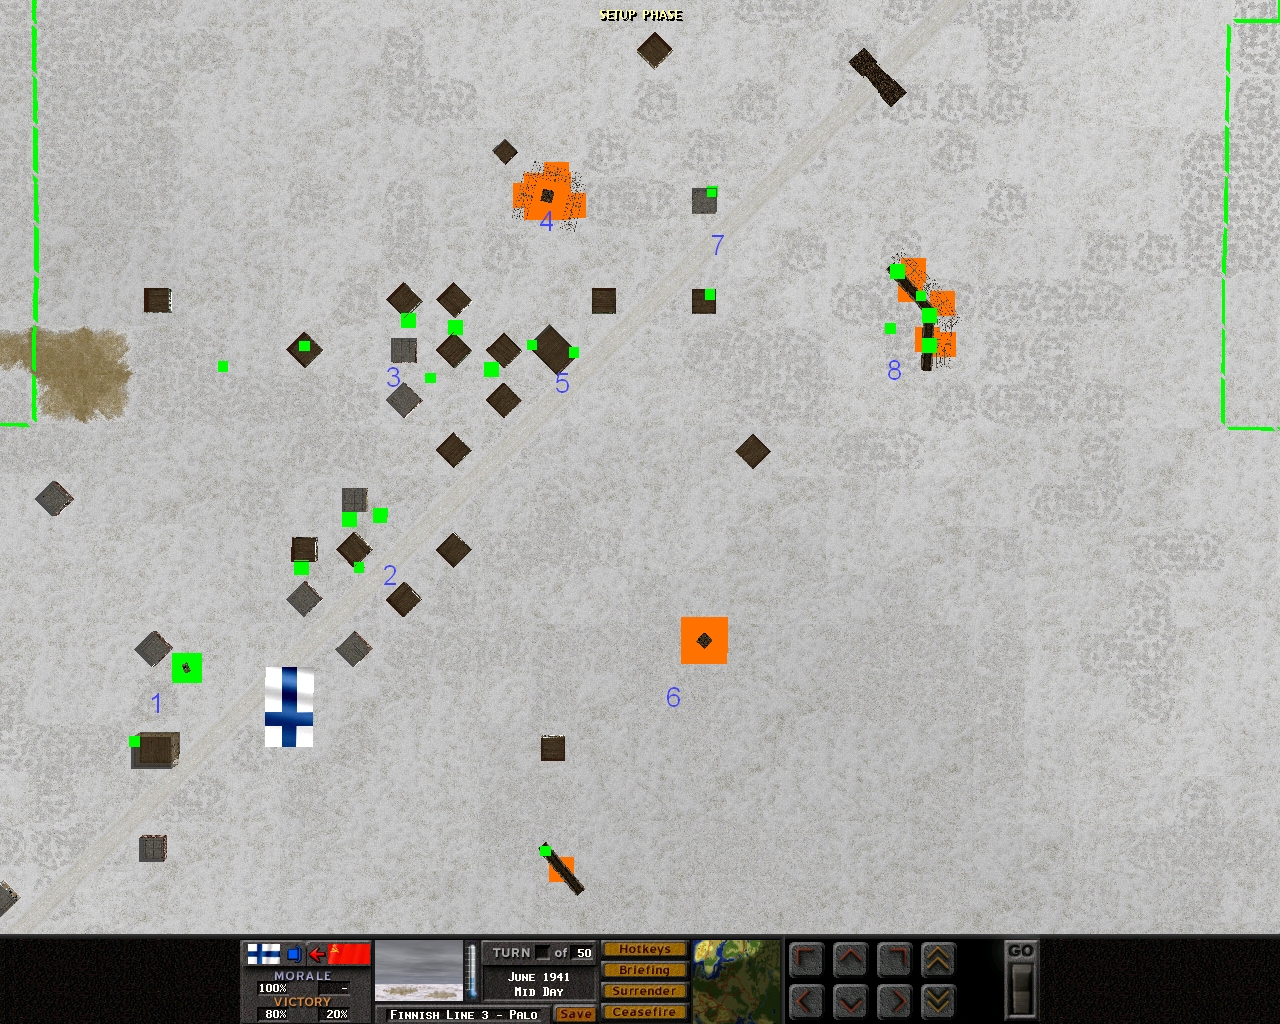
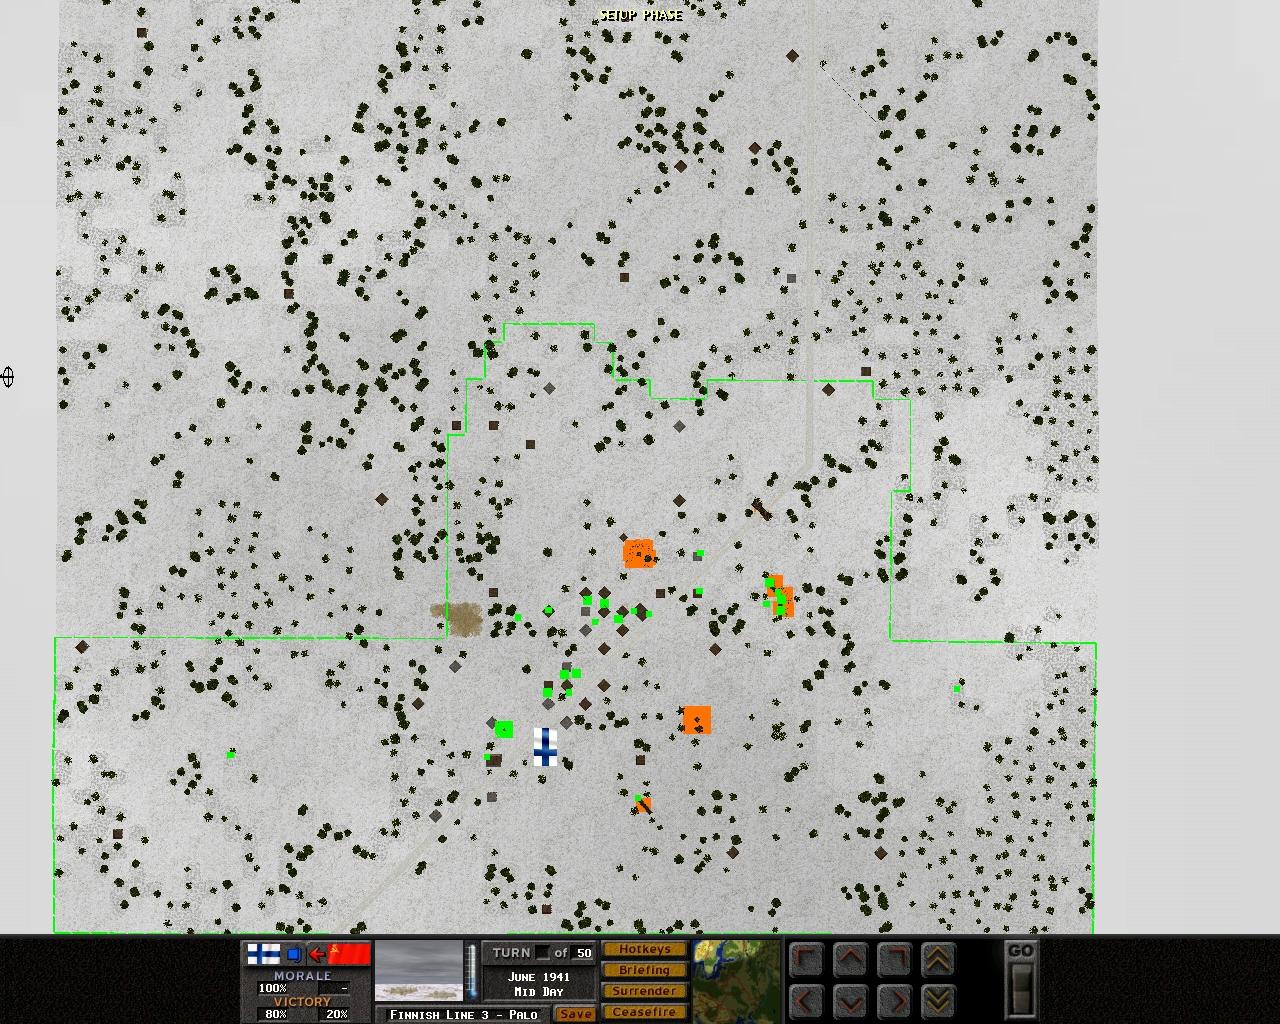
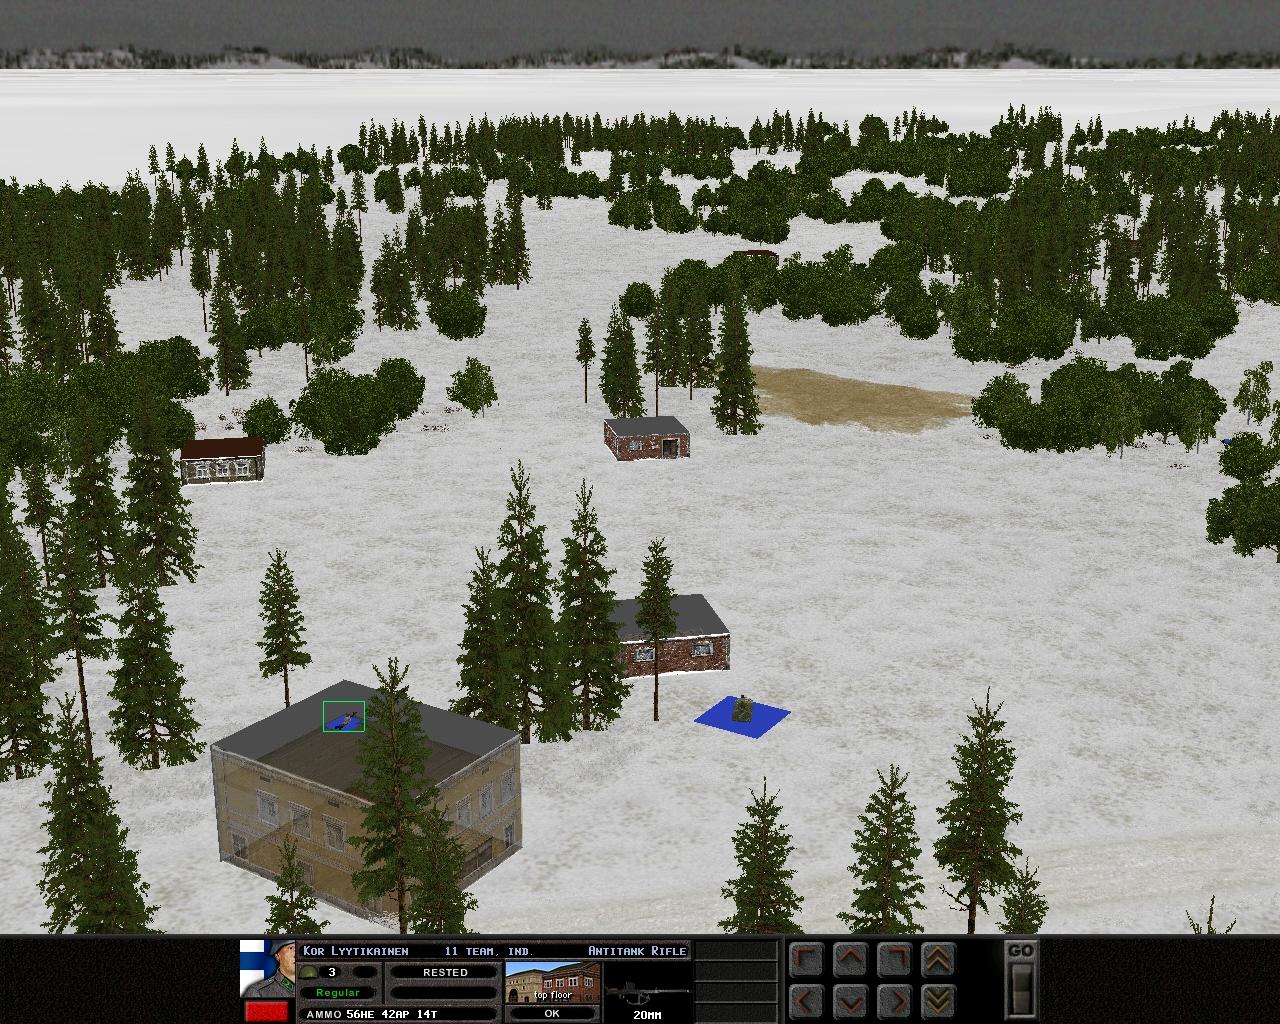
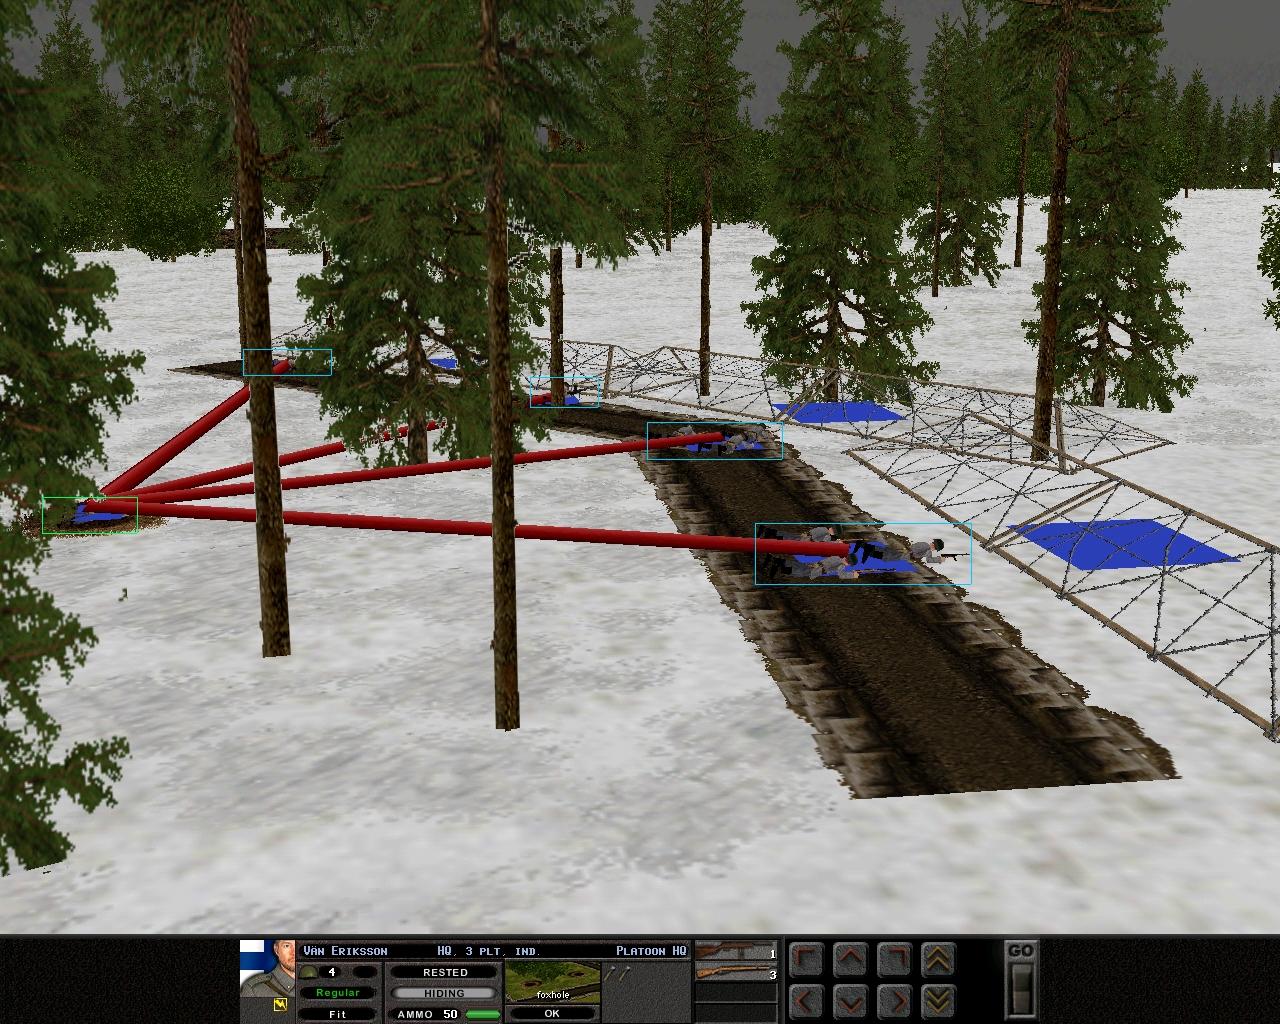
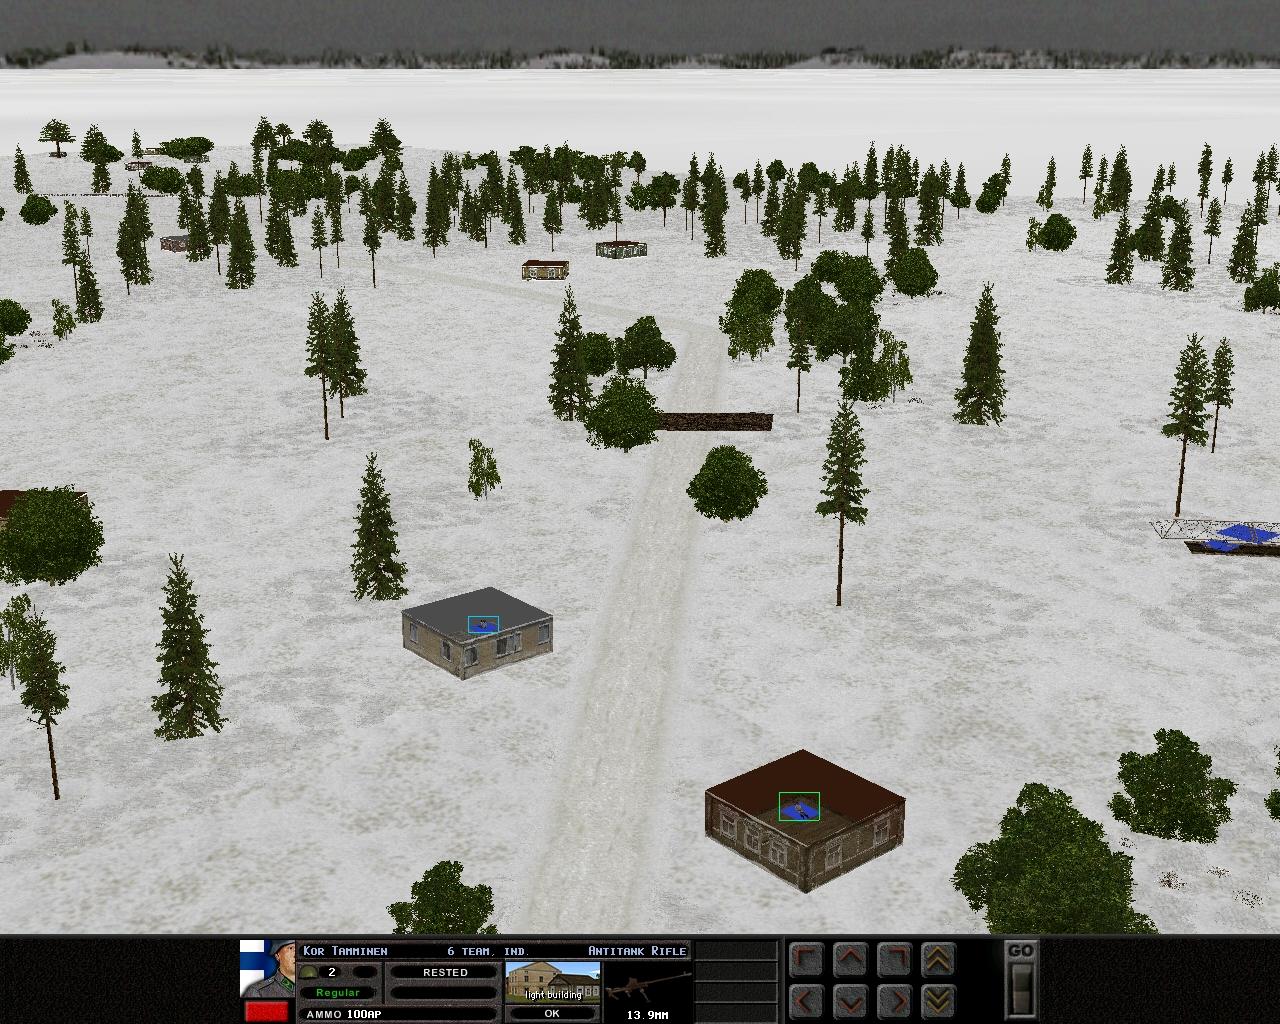
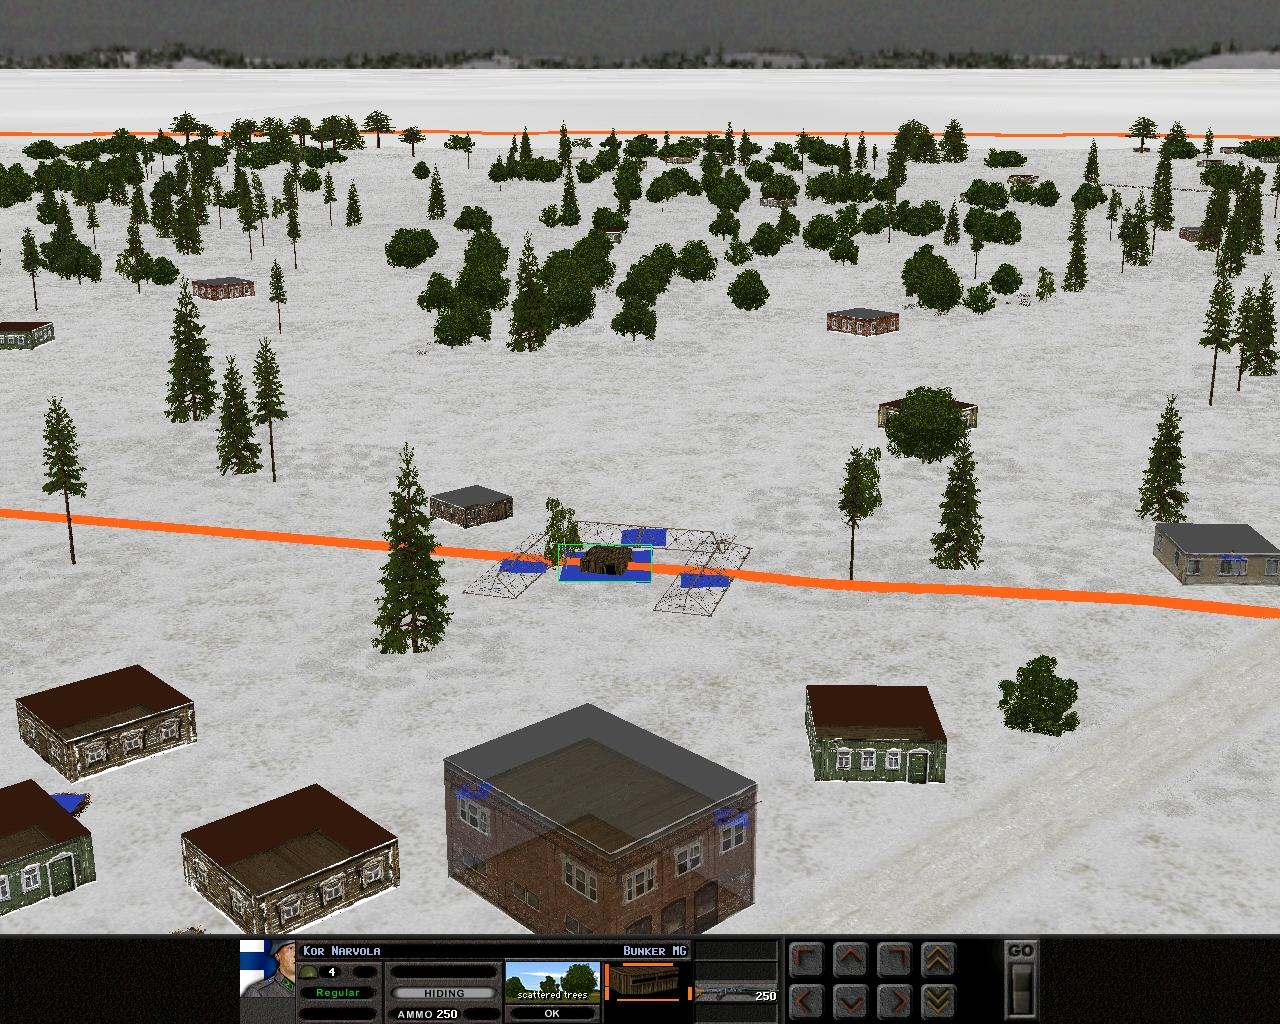
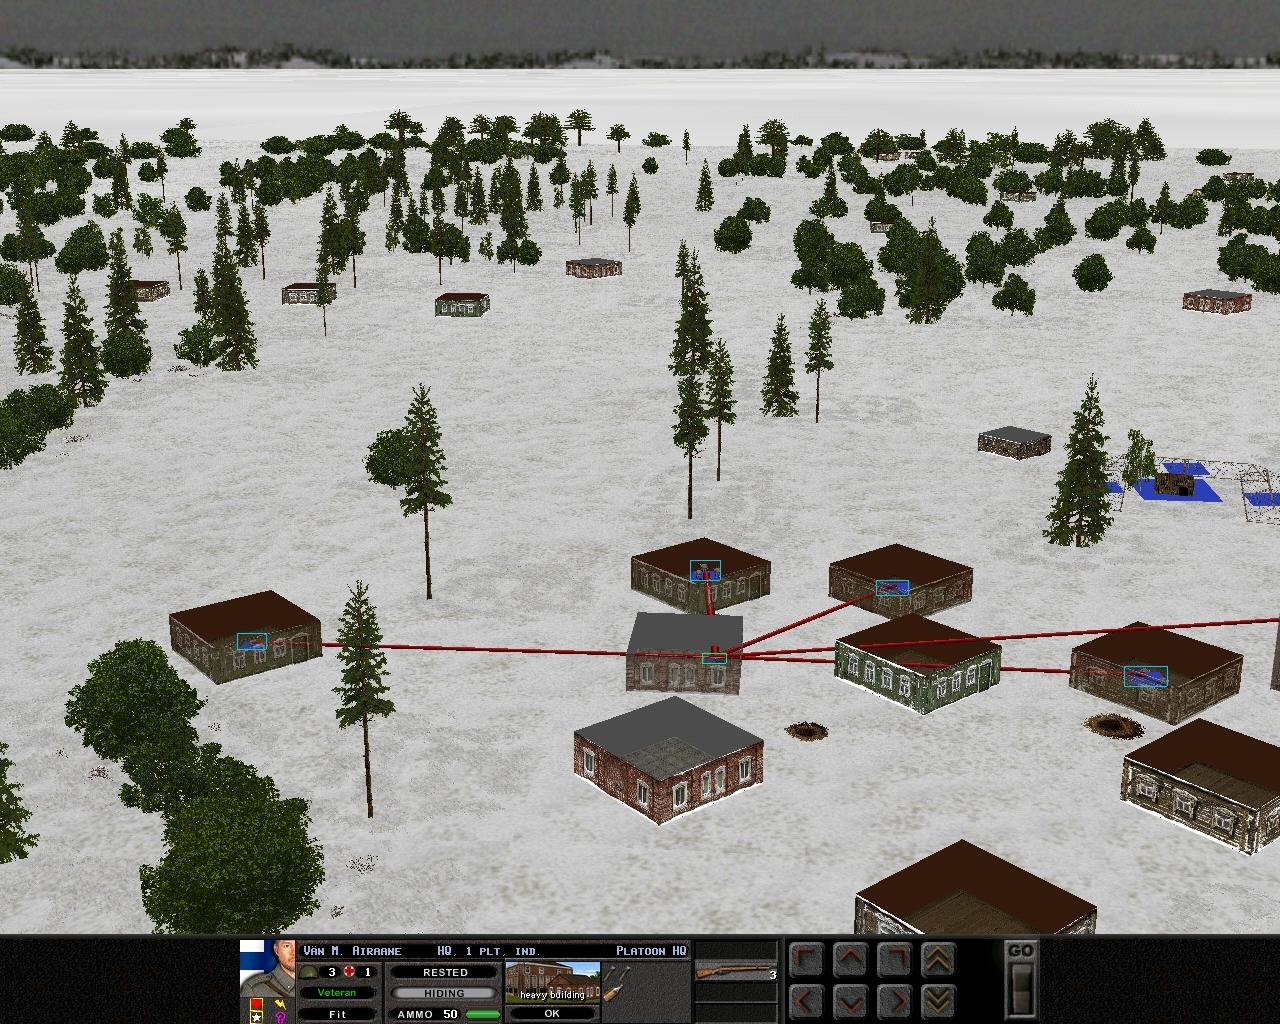
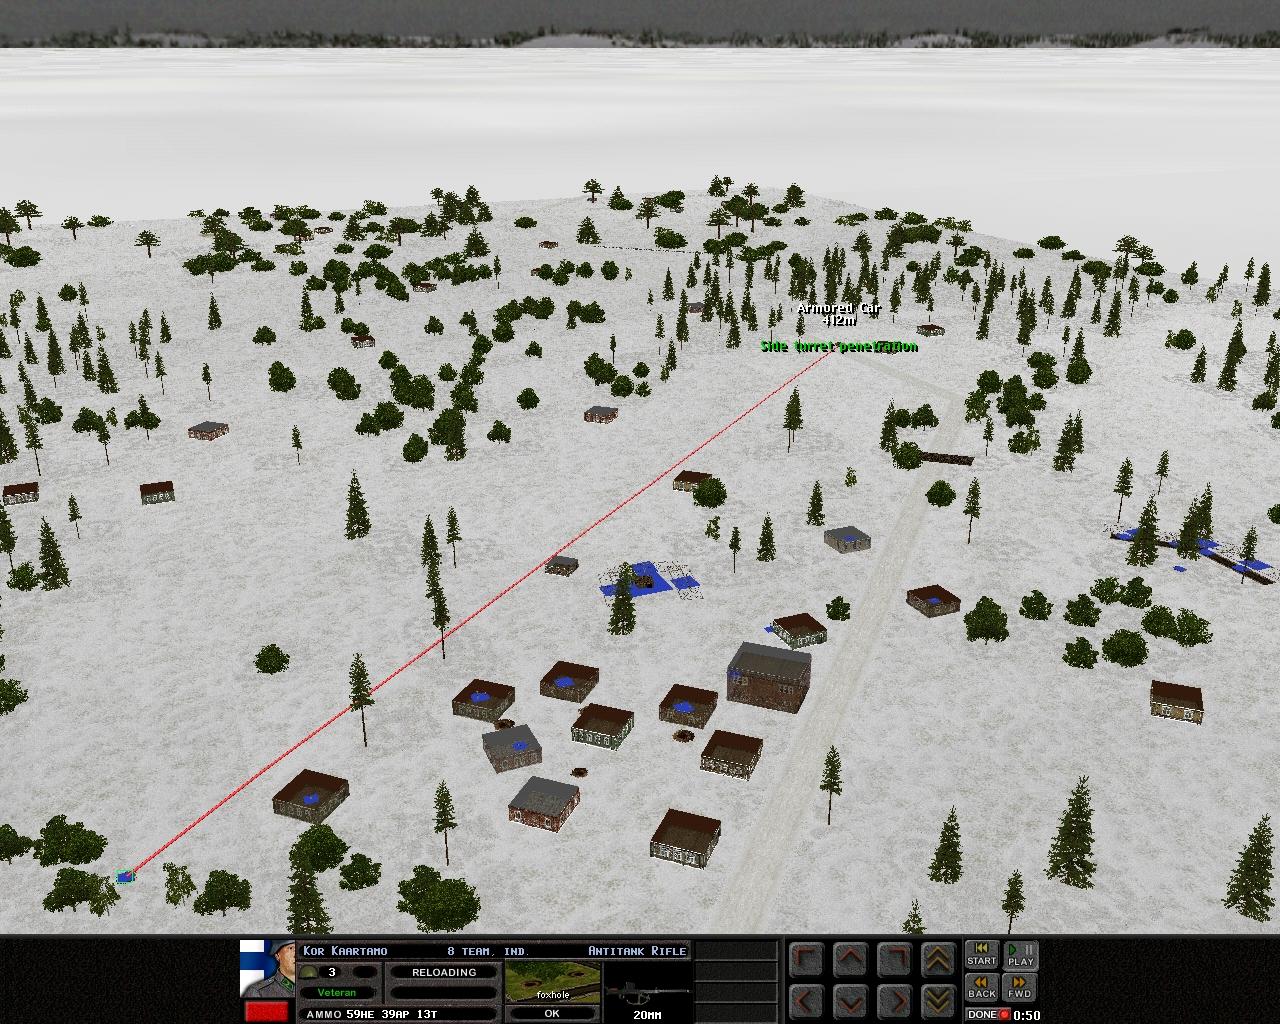
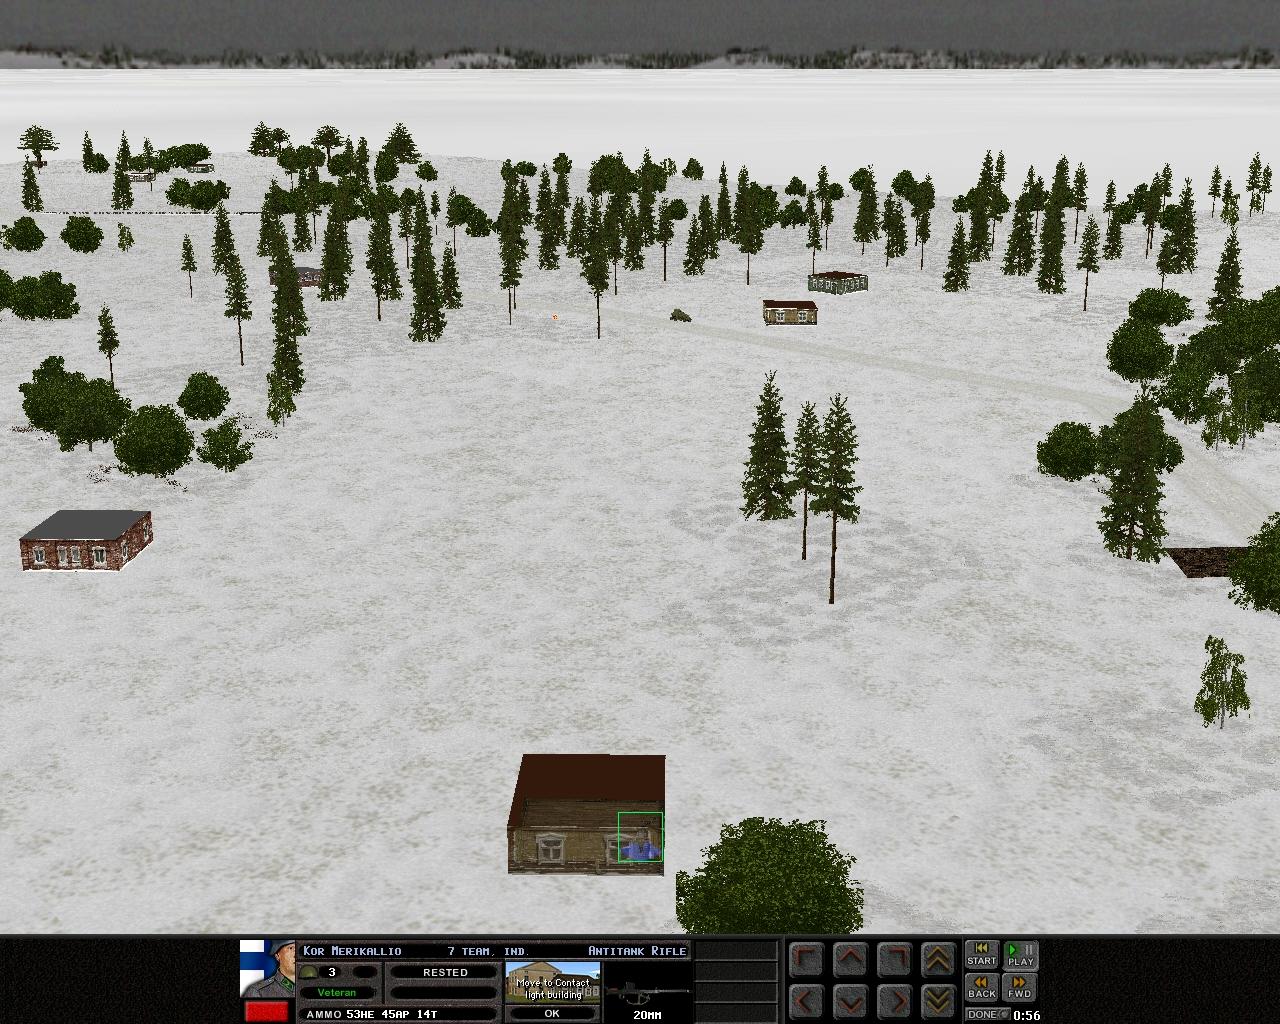
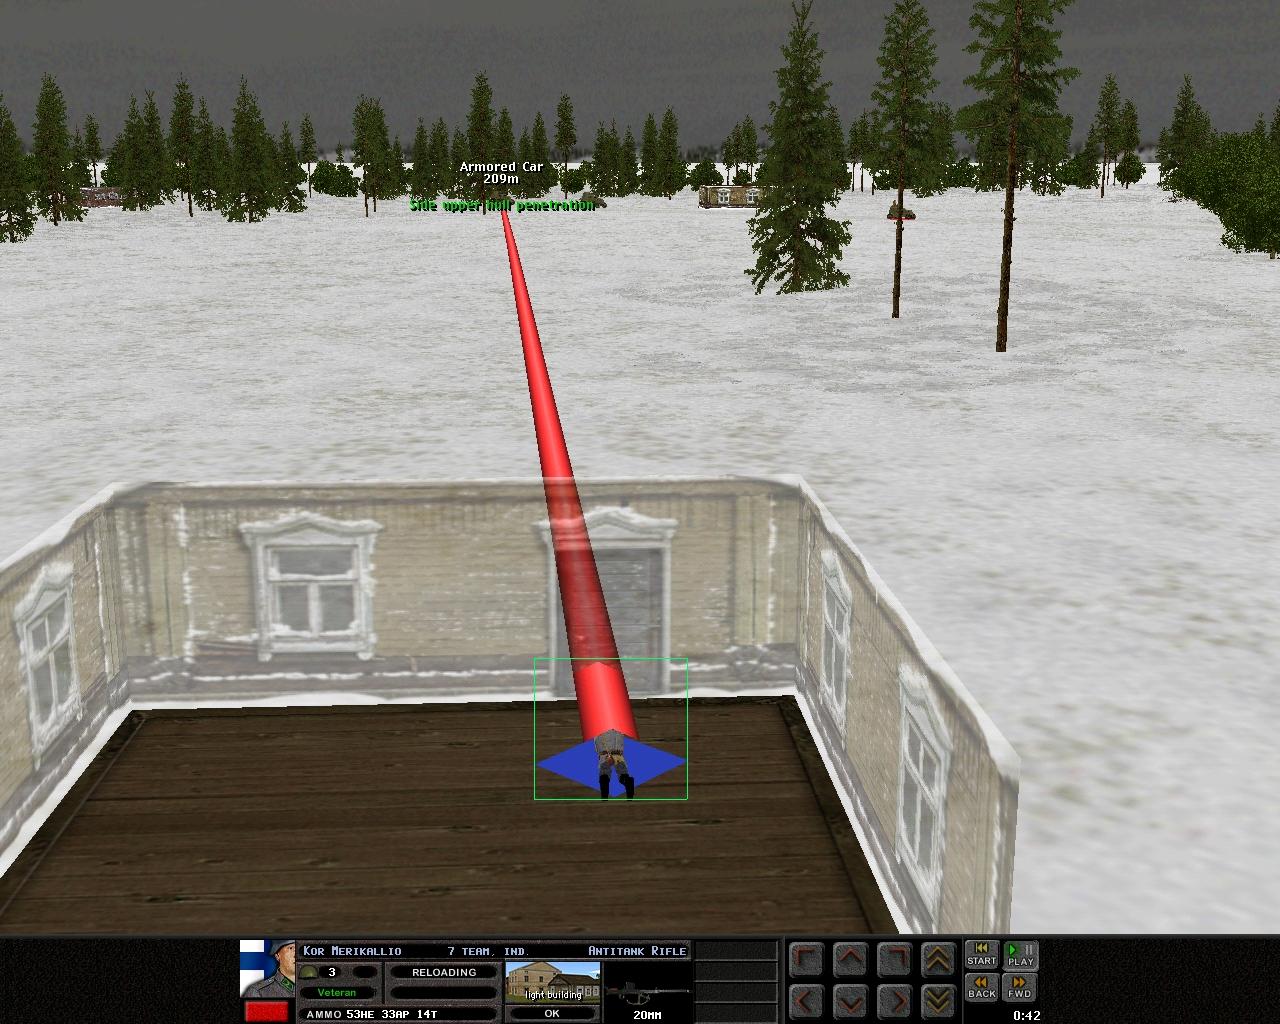
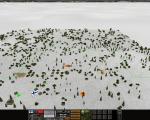
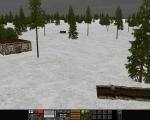
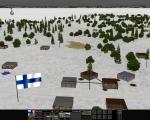
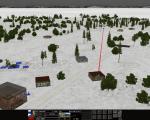
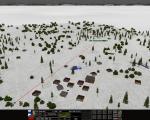
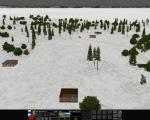
1939. With the signing of the Molotov-Ribbentrop Pact, eastern Europe was secretly divided up into Soviet and German spheres of interest. Finland was to fall under the Soviet sphere. Yet, unable to obtain concessions from Finland through negotiations, the Soviet Union invaded. The Winter War began. Outnumbered, with essentially no tank forces, a tiny air force, and a lack of materiel, the Finns attempted to stop the Soviets. This will be me controlling the Finns, versus a Soviet attack, in 1939, very early in the Winter War. It's cold and still, overcast, and there has been a light snow recently. The battle will be 50 turns. The terrain is mostly flat, some very gentle slopes, covered with a lot of scattered trees. Overhead view of the battlefield. High angle view. FORCES 3x Jaakari ("fighter" I believe, basically, infantry) platoons. 4x Maxim machine guns. 3x Boys 13.9mm anti-tank rifles. 5x Lahti L-39 20mm anti-tank rifles. 2x machine gun bunkers. 1x BA-20 armoured (ha!) car. They are laid out thusly: 1) Lahti ATR team and BA-20 AC. Guarding my left flank, Lahti on the upper floor. 2) Glad's platoon. 3) Airaane's platoon, approx 70% strength, with Maxim and Lahti teams. 4) Narvola's bunker. Surrounded by barbed wire, will not be easy for infantry to assault. 5) Maxim and Lahti teams. Covering the road from the upper floor. 6) Viljakainen's bunker and Lahti team in trench behind it. Covering Eriksson's platoon. 7) Maxim and Boys teams. Covering the road. 8) Eriksson's platoon and Lahti team. Sitting in trenches, behind barbed wire. Not shown are two Boys ATR teams, one on the far right and far left, guarding against flanking vehicles. OBJECTIVE Hold the village. Soviet penetration into Finland must be stopped dead. PLAN My ATRs should be mobile and respond to armoured threats. The two Boys ATRs out on the wings especially should be prepared to come in quickly and engage passing armour. Eriksson's platoon should be able to hold, given its prepared position, but the other two will have to be fluid and keep moving if needed. The BA-20, ideally, will not get killed by a tank, and will provide quick-response MG fire. My Maxim MGs have plenty of ammo, and they can lay down all the fire they want. I want to keep the bunkers alive as long as possible, so they will be covered by MGs and ATRs. Turn 1 On the left, Lyytikainen's Lahti team watches over the BA-20 AC, their view impeded by trees, but with clear lanes of fire extending up to 700m in places. The 20mm Lahti L-39 anti-tank rifle is heavy and unwieldy, but the three-man team are adept and have grown used to it. They no longer curse it as much as they once did, anyway. With 112 rounds of ammo, divided roughly 50%/40%/10% between AP/HE/T, they know they can give a good account of themselves. On the opposite side of the Finnish position, Eriksson's platoon are as happy as men in open positions can be. It is their turn to occupy the trenches instead of the warm houses of the village, but they make the best of it, huddled down close to each other for warmth, in good cold weather gear, feet clear of the slush in the bottom of the trenches. The Lahti team are on overwatch, looking and listening for the enemy. Situated so close to the roadblock, they know this position is likely to be where first contact with the enemy will happen. Turn 2 Dedicated to covering the road are a Maxim team in the house on the left, and a Boys team in the house on the right. Each team has sorted out a good firing position, stacking ammo neatly close by, lining their weapon up on the road, noting ranges and likely routes of approach. They know that when the enemy vehicles spot the roadblock, they will have a few seconds to take advantage of that surprise. To their left lies Narvola's bunker. Dug several feet into the earth, which is as hard and as cold as iron, it is stoutly constructed of local lumber, and fenced off on three sides by barbed wire. Its machine gun has thousands of rounds of ammo on hand, close by and safe from the elements. Not sited to cover the road itself, but the approach to the village through the forest if, say, a column of vehicles spotted a roadblock and then sought the shortest route through the woods. It is watched over by a Maxim team and a Lahti team, sharing the upper floor of the village hall. Turn 3 And to their left lies Airaane's platoon, accompanied by a Maxim team and a Lahti team. With 8 men missing from 31, the platoon is under-strength, but they are the only veterans there, scoured and chafed rough by their recent acquaintance with war. The solid core of the Finnish force and position. They have more Molotovs and grenade bundles than the other two platoons combined. Behind Airaane's platoon, covering the other side of the road, lies Vil's bunker, covered by a Lahti team. The bunker, identical in construction to Narvola's, lacks only the finishing touch of barbed wire. The bunker is sited to cover Eriksson's platoon and the right side of the road. The Lahti team, secure in their trench and managing to stay at least somewhat comfortable, ensures no tanks will be able to KO the bunker without trouble. Turn 4 Last but not least, between the BA-20 AC and Ariane's platoon, lies Glad's platoon. No casualties, but no experience of war, yet, they sit in houses which are dry, if not as warm as they would like because the NCOs will not allow fires, and wait. One man begins to whistle and is promptly cuffed around the head and asked if he would like his face to be used as a sleigh. Turn 5 The Lahti team in the village hall decides that perhaps a more forward position, somewhere covered by Narvola's bunker, might be better, for early warning purposes, if not for shooting. Just as they leave the building's warmth for the still, frigid air of winter, an enemy is spotted. An armoured car? The Boys ATR team opens fire, and misses. The shooter swears at the gun and reloads. He misses again. The Maxim team across the road, watching this happen with something between horror and hilarity, decides to help. Two bursts of fire send rounds spanging off armour. The Boys misses again. A Lahti joins in. A hit, a scream, and the armoured car rolls to a halt. "That's what you want, lads." The Lahti shooter slaps the massive rifle affectionately. "Good Finnish engineering, none of that British shit." Turn 6 The surviving crewman piles out of the armoured car and runs for it. The Maxim team let him have a few rounds for a laugh, and watch him disappear into the trees. "Come back, Ivan, you've left your engine running!" Turn 7 Merikallio's Lahti team, spurred on by the beginning of the battle, hurry on and reach their destination, a house just forward of Narvola's bunker, with a good view of the road. They set up quickly, the abandoned armoured car a cheering reminder of what they can do. Turn 8 With every unit now alerted, waiting becomes painful. Men check their weapons for the tenth time. Airaane nudges the closest private. "Have they all ran away?" Turn 9 Merikallio's decision is quickly justified by the appearance of another armoured car. The death of its predecessor doesn't put it off. Nor do three 20mm penetrations, to Merikallio's annoyance. A third armoured car comes into view. Turn 10 As the second armoured car is hidden by trees, Merikallio spots the third and swaps targets. Multiple penetrations stop the armoured car. It reverses out of sight. Merikallio grins smugly. And although hidden from him, the third AC is still in view of the Boys ATR...


-
In September 1941, the Germans launched Operation Typhoon, with the ultimate objective of capturing Moscow. The Das Reich division, on the highway to the Russian capital, needs to capture a strategically important objective, a crossroads, where the village of Mozhaisk has grown. The Russians are taking not one step back, defending stoically and ignoring losses. The Germans are determined to continue. The unstoppable force meets the immovable object. OBJECTIVE The objective is to capture the crossroads and the town of Mozhaisk. If all goes well, securing the road beyond the village is a secondary objective. Overhead. http://i62.photobucket.com/albums/h109/FullAuto_2006/Moz/op1.jpg Approximately 700 metres from the start line to the objectives. http://i62.photobucket.com/albums/h109/FullAuto_2006/Moz/op2.jpg The lay of the land is interesting. The ground slopes up, mostly, towards the objective. The rail line running parallel to the road down the centre of the map is on a bare ridge, suicide to use that. To the left of that, it's rather bare, some patches of trees, some shell craters. In the centre, it's not bad at all, plenty of trees and brush. On the right, the ridges could be used as cover IF the troops can cross the ridges before getting shot up. Reverse view. http://i62.photobucket.com/albums/h109/FullAuto_2006/Moz/op3.jpg FORCES I have an infantry battalion to play with, 3 companies each consisting of 3 platoons. Each platoon has four units, three sections and a HQ. The sections are the sexy kind with two MGs, plenty of firepower. For extra firepower, each platoon has a 50mm mortar team. I've taken these teams and grouped them into two lots, instead of having them try and fail to keep up with the infantry. They'll be providing bomb-droppy services from cover. 6 MG 34 heavy machine guns. 7 Sturmgeschutz assault guns, my only armour. Respectable workhorses, but not tank killers. 1 105mm artillery spotter, with a rather meagre 60 rounds to call down. PLAN OF ATTACK Main thrust will be central, 5 platoons, backed up with 3 Stugs and 2 MGs. On the right, two platoons will attempt to cross ridges as fast as possible and get into the gullies. Repeat 'til objective is reached. In support, a group of 50mm mortars, and 2 Stugs. Behind the start position on the right, atop a wooded hill, 2 MGs and the arty spotter wait, commanded by the battalion HQ. On the left, prospects are slim. I'm not really expecting to get anywhere here, the ground is rather bare. 2 platoons, 2 Stugs, 2 MGs, and a mortar group. Hopefully they can grind forward into positions where they can give fire support to the main attack at least.
-
Operation Epsom, or as I dubbed it, Operation Awesome. Currently rolling thorugh miles and miles of farmland and small towns versus ze Nazis, only to come a cropper, losing tanks all over the shop. Why, you ask? Here's why: http://i62.photobucket.com/albums/h109/FullAuto_2006/opepsom.jpg I lost two tanks to the terrain in the first few turns, one bogging down in a ford (fair enough), one stricken by bushes, and then, a few turns later, I lost two tanks to wheat. So far, I have lost one tank to ze Germans, and four to bloody sodding geography and plant life. I know tanks aren't all that reliable despite being explicitly designed for cross-country movement, but how would you explain wheat away? Note to self: Keep tanks on roads. I'm sure ze Germans won't mine them or cover them with anti-tank guns or anything.
-
I can't do justice to the briefing, so I'll simply display it here. I doff my cap to scenario designer John Bertles. http://i62.photobucket.com/albums/h109/FullAuto_2006/ATo2R/ato2r1briefing.jpg http://i62.photobucket.com/albums/h109/FullAuto_2006/ATo2R/ato2r2brief2.jpg http://i62.photobucket.com/albums/h109/FullAuto_2006/ATo2R/ato2r3brief3.jpg So I assume it's going to be an escalating battle, with various clumps of reinforcements turning up at odd times. It's 1943, the weather is cool and overcast, damp but not raining, so not too bad for men or vehicles. The terrain is a little challenging. http://i62.photobucket.com/albums/h109/FullAuto_2006/ATo2R/ato2riso.jpg The overhead view reveals why the town is the main objective. http://i62.photobucket.com/albums/h109/FullAuto_2006/ATo2R/ato2roverhead.jpg Two flags on the main approach to it, and three flags in the town itself. My forces are a little light, but hopefully some of those reinforcements should turn up soon. I've divided my chaps into two groups. On the north bank, I have one PSW 232, a funky eight-wheeled reconnaissance vehicle armed with a 20mm cannon, two Panzer IIIN tanks armed with 75mm guns (the dinky little L/24 versions), and two infantry reconnaissance platoons (3 sections and a HQ each). On the south bank, I have a PSW 222 (only four wheels on this one, damn it) with a 20mm cannon, two halftracks with MGs, two Sturmhaubitzes with 105mm guns, a 37mm anti-tank gun, two MG 42 LMG teams, two 81mm mortar teams, and a 75mm artillery spotter. As these forces are really quite light, and I have 45+ turns to play with, I'm going to be very tentative, and settle for identifying enemy forces rather than immediately getting into a battle. My plan is thus: N-Group will be very, very cautious indeed. The PSW 232 will probe ahead of my Panzers, checking out the road. The zig-zag shape, and high sides, make the valley a perfect fatal funnel to enter, with each zig and zag covered by MG/ATG fire from positions up on the high ground. The Panzers will roll up well behind the 232. The infantry platoons are going to push into the woods towards the town, taking no risks. Note I've turned trees off and scaled the units up for a clearer view plus it's hilarious. http://i62.photobucket.com/albums/h109/FullAuto_2006/ATo2R/ato2rnbplan.jpg S-Group's objective will be to blow the shit out of the town. I know fine well there are umpteen enemy units in and around it, dug in, with plenty of ammo. So, I'm going to drop my 75mm Uncle Arty liberally on the town, then take out as many buildings as possible (hopefully all of them) with my Sturmhaubitzes. Their 105mm guns should make short work of most buildings (my best HE chuckers on the map, blast rating of 115, compared to 3 for my 37mm ATG, 26 from the 81mm mortars, and 45 from my Panzers). The 81mm mortars I'll save for point targets, and my LMGs for engaging any enemy infantry doing a runner. The 37mm ATG will cover the 222 as it advances very very slowly indeed up the road. The two halftracks will be sitting quietly on their best behaviour, acting as transport for the mortars and ATG. http://i62.photobucket.com/albums/h109/FullAuto_2006/ATo2R/ator2sbplan.jpg Eat it, Rommel. Turn 1 A Stuh (sounds like it's missing a consonant after talking about Stugs for so long) MtCs forward, and takes up a nice position overlooking the bridges into town and the surrounding area. http://i62.photobucket.com/albums/h109/FullAuto_2006/ATo2R/ato2rstuhfirpos2.jpg From there, he can hit some of the outlying buildings, and keep an eye out for any ATGs on the hills behind the town. The other Stuh, arty spotter, mortars and LMGs are all taking up position on this hill. Firepower City. N-Group's 232 probes into the beginning of the valley. http://i62.photobucket.com/albums/h109/FullAuto_2006/ATo2R/ato2rnbpswprobe1.jpg I really don't like going in here. Most of the valley sides are too steep even for troops. Killing ground for sure. Never mind MGs and ATGs, what about infantry chucking Molotvs and grenades from the top of those ridges.
-
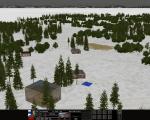
It's February 1944, and the tide on the Eastern Front has well and truly turned. With the formation of the Korsun-Cherkasy Pocket, a sizeable portion of German Army Group South was surrounded. Cut off, and with relief efforts en route, the pocket must hold. On the southern side is the lovely little shell-scarred village of Novo Buda, an important strongpoint in the perimeter. Holding it are a force of Walloons, who fight for ze Germans in the hope that one day the state of Burgundy will be restored to existence. Why 'Hitler's Son'? Leon Degrelle, one of the commanding officers, was an ardent fascist and careerist, and Hitler once remarked that if he ever had a son, he would want him to be like Degrelle. This will be a defence against the Russian Guards Cossack Cavalry. It is both foggy and raining, limiting vision to about 150m, and making movement slow. The terrain is a mix of damaged town and woods on mostly flat ground with some gentle slopes. Four flags up for grabs, all four of them initially in my hands. The battle will last 35+ turns. http://i62.photobucket.com/albums/h109/FullAuto_2006/CM/HS/hs1overhead.jpg My force mix is a bit more complicated than usual, so I'm going to explain it at length. If you want the battle, skip to the next post. I have at my disposal: 1 76.2mm AT gun. Captured from the Russians, a decent enough gun, but there isn't a lot of ammo for it, and the crew is two men down. http://i62.photobucket.com/albums/h109/FullAuto_2006/CM/HS/hs376mmatgun.jpg 1 halftrack towing a 75mm AT gun. The 75mm will definitely come in handy, but thanks to the short visual range of this battle, both AT guns will be susceptible to forces flanking them just out of sight, and moving in and engaging them before the gun can aim at them. http://i62.photobucket.com/albums/h109/FullAuto_2006/CM/HS/hs11ht75mmatgun.jpg 3 Panzershreck and 5 tank hunter teams. Given the short range this battle will be taking place at, these chaps will be invaluable. The 'shrecks are deadly, but their accuracy is not brilliant. 2 MG34 LMGs. Sadly, the only MG teams I have. Good for harassing fire, but not really that good at actually killing people. Will work nicely tucked in with a platoon though. http://i62.photobucket.com/albums/h109/FullAuto_2006/CM/HS/hs4mg34lmgs.jpg 1 Flamethrower. The absolute devil, when it actually fires. The small team size and extremely short range (32m) means they are often wiped out before they get a shot off, but the enemy won't stand firm when on fire. Can also take out tanks. http://i62.photobucket.com/albums/h109/FullAuto_2006/CM/HS/hs6flamethrower.jpg 1 Sniper. Great for eliminating pests like gun crews and tank commanders. Very difficult to spot. http://i62.photobucket.com/albums/h109/FullAuto_2006/CM/HS/hs7sniper.jpg 1 Marder III. Gun's a bit weak, armour's nothing special. Not much ammo either. I'll have to be careful with this 'tank destroyer'. http://i62.photobucket.com/albums/h109/FullAuto_2006/CM/HS/hs8marder3.jpg 5 Stugs (2 IVs, 3 IIIs). Not real tanks, but decent enough. Lack of a turret means they're a smaller target at least. The IIIs don't have much MG ammo, and the IVs don't even have MGs, so they will need protecting from infantry assault. http://i62.photobucket.com/albums/h109/FullAuto_2006/CM/HS/hs9stug.jpg 2 Panzer IVHs. Brilliant tanks earlier in the war, now a bit weak. Plenty of ammo. Very experienced. http://i62.photobucket.com/albums/h109/FullAuto_2006/CM/HS/hs10pivh.jpg 2 Company HQs. Good at close range, may be necessary to use in the front line to hold flags. 2 Battalion HQs. Even better at close range, and ditto. 7 platoons of infantry, though some have up to 40% casualties. Got a mixture here, and although a lot of the platoons are under strength, I have an engineer platoon at full strength, with demo charges. Boom! Most of my troops are experienced, at Veteran level or better, with only one Green platoon. The terrain is quite dense, plenty of woods, a fair few buildings/piles of rubble, and as the area has seen intense fighting recently, plenty of shell craters for my infantry to hide in. http://i62.photobucket.com/albums/h109/FullAuto_2006/CM/HS/hs2setup.jpg I definitely want to hold the three flags in the middle, while the one on my right flank I'll defend lightly, but concede rather than take major casualties. I think I'll put my AT guns on my flanks, with some other AT assets around them, to prevent my whole force (not to mention the AT guns) being flanked. My infantry is a mix of capabilities. I have four 10-man pioneer sections: http://i62.photobucket.com/albums/h109/FullAuto_2006/CM/HS/hs12pzpioneerfp.jpg Decent firepower, a good stock of ammo, and they're carrying AT weapons and demo charges. I could kiss these beautiful Landsers. Some under strength panzergrenadiers: http://i62.photobucket.com/albums/h109/FullAuto_2006/CM/HS/panzergrenfp.jpg Now, although weakened by casualties, these chaps can still provide a surprising amount of firepower out to long range (not really applicable here, admittedly) because they're toting two LMGs (this innovation is why infantry sections today carry an MG in each fireteam). With short-range firepower provided by Company HQs: http://i62.photobucket.com/albums/h109/FullAuto_2006/CM/HS/hs15coyhqfp.jpg And Battalion HQs: http://i62.photobucket.com/albums/h109/FullAuto_2006/CM/HS/hs14batthqfirepower.jpg I've got two areas to set up in. The green area holds most of my forces, the yellow holds three platoons, a coy HQ, a Batt HQ, a Panzershreck and two tank hunter teams. The Stugs, Panzer IVHs, and the 75mm gun are on the roads leading into the town. The vehicles are going to rush in and get set up ASAP, but the infantry I want to move in at a steady pace, not arrive tired, and act as a reserve, reinforcing any weak areas exposed by Ivan's attack. I'd love some mortars and HMGs, but you can't have everything. Oh, and some support from Uncle Arty.
-
Another small battle, as I can knock it out quickly. June, 1944, and the Russians are starting to shove the Germans back from whence they came. Operation Bagration is coming, but in order to destroy the invading sausage-eaters, we must know where they are! http://i62.photobucket.com/albums/h109/FullAuto_2006/CM/ADI/adi1setup.jpg In perfect conditions for a battle, I'm to lead my recce force of 5 T-70 tanks to find the enemy and perhaps give them a bit of a slap. Three flags, two small and one large, to capture, over 18 turns. http://i62.photobucket.com/albums/h109/FullAuto_2006/CM/ADI/adi3overhead.jpg The T-70 is a compact little beast. http://i62.photobucket.com/albums/h109/FullAuto_2006/CM/ADI/adi2t-70.jpg Armed with a 45mm main gun, and a coaxial machine gun, it can't slug it out against real tanks, but is at the heavier end of the spectrum for light armoured vehicles. Got a decent ammo load for the main gun, but not much MG ammo. It's also fairly nippy, so shoot and scoot will be the order of the day. http://i62.photobucket.com/albums/h109/FullAuto_2006/CM/ADI/adi4t-70stats.jpg The terrain is fairly hilly (trees off for a clear view). http://i62.photobucket.com/albums/h109/FullAuto_2006/CM/ADI/adi5terrain.jpg This means lots of getting hull down and not getting blown up, hopefully. I'm going to race for the closest flag, then set up two tanks covering and three leapfrogging forward to capture the large central flag. Only if things go really well will I try for that last flag. With only five tanks and no reserves at my disposal, I'm going to have to be like Alice, only cautiouser and cautiouser. Turn 1. My column advances down the road, fast as they can. http://i62.photobucket.com/albums/h109/FullAuto_2006/CM/ADI/adi6turn1.jpg No sign of any enemy. I had expected to at least receive a little bit of fire from infantry in the town, but perhaps the opposing force is arriving at the same time as I. A good illustration of hull down. http://i62.photobucket.com/albums/h109/FullAuto_2006/CM/ADI/adi7hulldown.jpg The T-70 is only exposing its turret, a small, well-armoured target. Any tanks advancing into sight will be exposed. Turn 3. http://i62.photobucket.com/albums/h109/FullAuto_2006/CM/ADI/adi8hunadvance.jpg German forces must be close, both flags have just changed. First contact! http://i62.photobucket.com/albums/h109/FullAuto_2006/CM/ADI/adi9firstcontact.jpg My commanders, their delicate shell-likes a-twitch, detect the smooth purr of well-tuned German engines. Turn 4. Enemy front! http://i62.photobucket.com/albums/h109/FullAuto_2006/CM/ADI/adi10puma.jpg The Puma is a fast, hard-hitting vehicle. Being wheeled, it's faster across nearly all terrain, and the 50mm gun is quite capable of taking on real tanks. Armour is a bit on the thin side though. Time for a bit of shot-swapping. http://i62.photobucket.com/albums/h109/FullAuto_2006/CM/ADI/adi11shotswap.jpg Not only is my T-70's armour thicker, it's more steeply sloped. Less penetration, and more ricochets per shot. Which is lucky, because with only 2 crew, a T-70 taking even one casualty becomes almost useless. That armour flaking isn't a good sign either, because even that can lead to casualties through spalling. Spall liners? You must be having a giraffe. Oh God why don't I just SHUT MY MOUTH. http://i62.photobucket.com/albums/h109/FullAuto_2006/CM/ADI/adi12spallkill.jpg One down, four to go!
-
It's not all hundreds of men and dozens of tanks in the world of Combat Mission. Some of the small scale stuff is great, intimate little battles in which every casualty, even that of a common rifleman, matters. In this case, it's Africa, 1942, and the SAS are hunting behind German lines for an irreplaceable German general, Erwin Rommel, the Desert Fox (not the Dessert Fox, that was Goering). With the German HQ located, the SAS mount a raid to kill the mastermind. This battle is small-scale, and short, just 10 turns. I have at my command a small group of SAS troops, and no reserves. If this goes wrong then I will at best escape, and at worst be wiped out. I have at my command: 3 Bren light machine gun squads 2 Boys anti-tank rifle squads (that's the name of the rifle, they're not manned by boys) 1 2 inch mortar 3 small platoons, consisting of 1 HQ and 2 rifle sections each 1 Company HQ The Brens don't provide a lot of firepower, but they do have a lot of ammo, more than enough for a 10-turn fight. The Boys will come in handy versus un- or lightly-armoured vehicles, but are useless against actual tanks. The mortar is a versatile weapon, but only carries 10 HE and 10 smoke rounds. Line of sight is short, because it's night, and there's the possibility of randomly targeting friendly troops, so I will have to watch my fields of fire. http://i62.photobucket.com/albums/h109/FullAuto_2006/CM/Desert%20Fox/df1overhead.jpg I've split my forces into three loose groups. On the left, you have Alpha, which is 2 Brens, 1 Boys, the mortar, and the company HQ. Alpha will provide fire support and watch the left flank. I love mortars, because they can have their fire directed by a HQ if they are in command range. So if the company HQ sees an enemy unit the mortar cannot, the HQ can direct the mortar to fire on the target. Bravo, consisting of my platoons, is in the centre. They will be storming the buildings, killing everyone, and so on. On the right, is Charlie, consisting of a Bren and a Boys, providing fire support and watching the right flank. http://i62.photobucket.com/albums/h109/FullAuto_2006/CM/Desert%20Fox/df2directview.jpg First turn goes not brilliantly. The Germans are actually awake, and standing guard and stuff. Damn their competent military tradition. http://i62.photobucket.com/albums/h109/FullAuto_2006/CM/Desert%20Fox/dfturn1.jpg An atrocious start, basically, with some of my rifle sections taking 50% or more casualties. In one turn. What was that I said earlier about each casualty being important? Shitting shit it. Belatedly, my mortar starts dropping smoke rounds for cover while my platoons try to recover from being turned into colanders. http://i62.photobucket.com/albums/h109/FullAuto_2006/CM/Desert%20Fox/df3mortarsmoke.jpg I may have shat in my own nest with this inept start. My rifle sections are the only units I have really capable of assaulting and taking buildings, and with them severely weakened, I might not be able to progress much further. Two of my rifle sections flee, and three (one of them reduced to its last man) manage to make it as far as the first building, thanks to the clouds of smoke from the mortar shells. http://i62.photobucket.com/albums/h109/FullAuto_2006/CM/Desert%20Fox/df4badlydone.jpg My Brens are giving all the supporting fire they can, but there's no substitute for chucking a grenade in the window and storming the building, all guns blazing. The Brens give covering fire, the mortar fires off its HE rounds, and still my rifle sections are mown down. http://i62.photobucket.com/albums/h109/FullAuto_2006/CM/Desert%20Fox/df6massacre.jpg To be honest, nothing could remedy this colossal balls-up. Note the corpses of Tommies everywhere. My remaining engineer rifle section chucks a demo charge into an enemy-held building. http://i62.photobucket.com/albums/h109/FullAuto_2006/CM/Desert%20Fox/df7demotime.jpg I really should have used them more. The explosion not only decimated the unit in the building, but inflicted casualties on two other enemy units close by. The Germans counter-assault the building I've managed to occupy, and one of the other buildings catches fire. http://i62.photobucket.com/albums/h109/FullAuto_2006/CM/Desert%20Fox/df8assaultfire.jpg Bren fire stops my unit from being overwhelmed, pinning several enemy units, but their ammo is running low. Success! http://i62.photobucket.com/albums/h109/FullAuto_2006/CM/Desert%20Fox/df9captured.jpg Having driven off the Germans, I've actually captured the main flag! Rommel is cowering in his office somewhere! Failure! Flag lost. http://i62.photobucket.com/albums/h109/FullAuto_2006/CM/Desert%20Fox/df10assist.jpg One of my rifle sections manages to recover from its faux-Somme experience enough to come to the rescue of my lonely unit in the building, surrounded and close to being wiped out. Fire from the Brens has now died down to desultory levels. The last throes of the initial plan. http://i62.photobucket.com/albums/h109/FullAuto_2006/CM/Desert%20Fox/df11pause.jpg Alpha and Charlie provide covering fire and guard the flanks, Bravo (the little that is left of it) attempts to storm the buildings. Or hold onto the single building it has managed to capture. To add insult to fatal injury, a tank. http://i62.photobucket.com/albums/h109/FullAuto_2006/CM/Desert%20Fox/df12tank.jpg Exchanging a few shots with my Boys AT rifle in Alpha, it gets worried enough to reverse out of sight. And that's it. Rommel slips away into the night. http://i62.photobucket.com/albums/h109/FullAuto_2006/CM/Desert%20Fox/df12results.jpg Bloody Hell. Well, what did I do wrong? Apart from everything. I should have attacked on a narrower front, with better cover, more concentrated covering fire, used the smoke rounds from my mortar straight away, used my two engineer sections to start each building assault with demo charges, and about a dozen other things. There you have it, ladies and gents, how not to assault an enemy HQ in 10 rubbish steps. Thanks to Wild Bill Wilder, scenario designer. It was of course inspired by real efforts to kill Rommel, and Steven Pressfield's novel, Killing Rommel, spurred me on to get off my arse and play the scenario.
-
It's August, 1942. German troops, every Tomas, Dieter and Helmut of them, are exhausted and dug in, ready to receive Soviet counter-attacks. My force is entrenched in Rshew Forest, it's dawn, and it is chucking it down. This operation is 10 battles of 15+ turns each. So don't say you weren't warned. That's my chaps, arranged in a (sort of) defensive line running west (left) to east (right). Russians will be approaching from the north. http://i62.photobucket.com/albums/h109/FullAuto_2006/CM-OR/OR1-allquiet.jpg I have three platoons of infantry (with light casualties), two light 50mm mortars, one MG 42 machine gun, two 75mm anti-tank guns, a company HQ, and a battalion HQ. I also have a kubelwagen and a gun tractor, but they're purely for transport, and are unarmed. First up, a bit of info about my units. The rifle platoon is made up of several rifle sections and a platoon HQ. The rifle section is the basic infantry unit. http://i62.photobucket.com/albums/h109/FullAuto_2006/CM-OR/or6-riflesection.jpg 10 men, armed with one machine gun (MG), bolt-action rifles, and a submachine gun (SMG). A decent amount of firepower. Put these lads in a trench, and the only way to shift them is with plenty of HE shells, infantry assault, or overwhelming small arms fire. The workhorse of virtually every army. Note the orange semicircle, which is the unit's field of fire. It's quite small because they're in a wood, and can't see very far, so it's useless to assign them a FOF covering hundreds of metres. Commanding the rifle sections is the platoon HQ: http://i62.photobucket.com/albums/h109/FullAuto_2006/CM-OR/or7-plthq.jpg Less men, and no machine gun, so a lot less firepower. But the HQ's job is not really to fight, though thanks to the SMG it's not bad at close range. The HQ's job is to command rifle sections, and it can't do that if it's dead. Providing sustained fire is the MG 42 HMG: http://i62.photobucket.com/albums/h109/FullAuto_2006/CM-OR/or9-mg42.jpg Provides more firepower than a rifle section, and is more effective at longer ranges. Ideal for covering large areas of open ground, but vulnerable to infantry assault and being shot up by bigger/more guns as they are slow moving thanks to that lovely heavy tripod. We then have the company HQ: http://i62.photobucket.com/albums/h109/FullAuto_2006/CM-OR/or12-coyhq.jpg Again, not really meant for fighting, but commanding. However, not too bad at close range. Top of the chain o' command is the battalion HQ: http://i62.photobucket.com/albums/h109/FullAuto_2006/CM-OR/or11-btnhq.jpg Although they really only should be used for command, they have excellent short range firepower due to having four SMGs. Great for fighting in streets, woods, forests, etc. Last but not least, the 75mm anti-tank gun. http://i62.photobucket.com/albums/h109/FullAuto_2006/CM-OR/or8-75mmatgun.jpg These are quite capable of killing tanks thousands of metres away, and can also lob HE shells at softer targets, smoke shells for cover, or tungsten shells for even better armour penetration than the standard AP round. Needless to say, neither of my AT guns has any tungsten rounds. From right to left. My right flank: http://i62.photobucket.com/albums/h109/FullAuto_2006/CM-OR/OR3-rightflank.jpg AT gun, and an infantry platoon, most of them in trenches. Look at all the lovely trees. Half of my troops can see just two things: jack and shit. The vehicle on the road is the gun tractor meant for towing that AT gun. Centre: http://i62.photobucket.com/albums/h109/FullAuto_2006/CM-OR/or4-centre.jpg Infantry platoon, in trenches. You might have noticed I'm stretched a tad thin, especially in woods where units can only see 30-40 metres. Left flank: http://i62.photobucket.com/albums/h109/FullAuto_2006/CM-OR/or5-leftflank.jpg Coy. and batt. HQs guarding the AT gun in the trench, mortar and MG in the next trench, infantry platoon in the trees on the far left.
-
Alrighty, Combat Mission: Barbarossa to Berlin is a simultaneous turn-based tactical war game, covering the eponymous period of World War II in Europe. Both sides issue orders to their units, one minute of play commences, then you get to issue orders again, another minute of war, rinse and repeat. It's a fantastic system, not the least because you can rewind the current turn to see your tanks blow up the enemy again and again and again. It's a very detailed game, with proper stats and ballistics and everything. Lots of stuff goes wrong, all the time. A Gift For Guderian is an Axis attack in central Roosha. I vill be controllink ze Axis, in zis case Germany. I've never played this scenario before. My job is to biff the enemy in the face, and capture as many flags as possible. My force consists of: *Three platoons of infantry in halftracks. Each platoon is made up of five squads, four infantry rifle squads and the platoon HQ. *Three PSW (I always feel it stands for Panzer Shit Wagon after seeing them blow up oh so easily) sort-of-armoured cars. *1 platoon of Sturmgeschutz assault guns (3 Stugs, to me 'n you). *One 150mm self-propelled gun. *One Company HQ in a Kubelwagen. Here is ze map: http://i62.photobucket.com/albums/h109/FullAuto_2006/CM/agfgsetup.jpg Thickly wooded, which is great news for the ambushers and terrible news for the ambushee (moi). There are only two bridges across each river, no fords, which means they'll be covered by multiple machine guns and anti-tank guns or I am a Bavarian. I have 23+ turns, which isn't really a lot of time, but will be more than enough if I can get in some big moves on the road with my vehicles. Did I mention Russians like to mine roads? Bastards. The town to the north-east, where the three flags are, is going to be the centre of enemy resistance, and I bet they're dug in like an Alabama tick. Roads with woods on each side are a nightmare for vehicle columns, so I debus two platoons of infantry and get them to sweep the woods. I've got a PSW at the head of each column, because they're rubbish and expendable. I'm going to get greedy, and attempt to capture all four flags. Group D (Diversion) will head east, attempt to capture the single flag, and if successful, speed round to the north and assist with the main objective: http://i62.photobucket.com/albums/h109/FullAuto_2006/CM/agfgegrp.jpg Group D: 1 PSW, 1 platoon of infantry and their halftracks, the 150mm SP gun, and the company HQ. I've turned trees off, so we can actually see what's going on. Group G for Glory (or possibly Gory) will be heading NE/N: http://i62.photobucket.com/albums/h109/FullAuto_2006/CM/agfgngrp.jpg Group G: 2 PSWs, 2 platoons of infantry & halftracks, and the three Stugs. This is my main punch. If Group D meet fierce resistance, I'll leave some troops to engage the enemy, pull back, and have them reinforce G. Easy peasy. Even simple movement isn't easy in CM games. There are lots of different movement types, and each time a waypoint is issued, it takes the unit seconds to process the new orders. The more waypoints, the bigger the wait. I've picked 'move to contact' for my inf as they comb the woods, which means they'll stop and engage any enemy they spot in their field of fire, but retaining unit cohesion is tricky. Note the red lines connecting Rau to the other squads of his platoon. That means they're within his command range, so they will fight better, boosted by Rau's command bonuses, and they won't take long to process new orders. http://i62.photobucket.com/albums/h109/FullAuto_2006/CM/agfgltrauplt.jpg Unlike Ruckner, who's done it wrong: http://i62.photobucket.com/albums/h109/FullAuto_2006/CM/agfgltruckplt.jpg The squads with black lines will become demoralised more quickly in combat, and will take about twice as long to work out new orders while they try to distinguish left from right. My platoons work their way through the woods, with the snap of twigs and the pffluuurt of army-ration-sponsored farts barely audible over the rain. http://i62.photobucket.com/albums/h109/FullAuto_2006/CM/agfgt2.jpg Turn 2. No Rooskies in the woods on this side of the river, and none spotted on the opposite bank. The tension mounts. D PSW moving up: http://i62.photobucket.com/albums/h109/FullAuto_2006/CM/agfgvehmovopt.jpg OH GOD THE OPTIONS. THE OPTIONS. WILL THEY NEVER END. The PSW MtC as well, ready to chuck it in reverse at the first whiff of trouble. Being an armoured car, PSWs are vulnerable to basically everything except small arms fire, and even then, the vehicle commander can catch a round in the face if he's got his head out. A real anti-tank gun can gut one with a single shot. G will cross infantry first, with a PSW watching over them. Surely its mighty 20mm cannon can ensure their safety?: http://i62.photobucket.com/albums/h109/FullAuto_2006/CM/agfgngrpbrdgcrossinf.jpg D cross with a PSW first, the SPG and infantry supporting: http://i62.photobucket.com/albums/h109/FullAuto_2006/CM/agfgegrpbrdgcrs.jpg If Ivan shows his pasty Slavic face, that 150mm has a blast bigger than Goering's arse. Turn 7: http://i62.photobucket.com/albums/h109/FullAuto_2006/CM/agfgt7.jpg Well, I am a Bavarian after all. Bridges are natural chokepoints, and great places to cover with MGs and AT guns. And mortars. And artillery. D's PSW, MtCing onwards, spots the flag up ahead go red. Red red. http://i62.photobucket.com/albums/h109/FullAuto_2006/CM/agfgenhflg.jpg So there are definitely Russian units holding it. The PSW continues on, the commander with his head out of the hatch. Visibility is piss-poor due to the bad weather, so he needs to keep his eyes peeled for enemy: http://i62.photobucket.com/albums/h109/FullAuto_2006/CM/agfgpolakobliv.jpg And, inevitably: http://i62.photobucket.com/albums/h109/FullAuto_2006/CM/aagfgpolaksptd.jpg Polak takes a bullet. That means that PSW won't fight as well in future, and its vision will be compromised, leaving it much more vulnerable to assaulting infantry, slower to spot AT guns shooting at it, etc. Not that it spotted where that shot came from anyway. Coming to the end of its move, the PSW comes under further fire: http://i62.photobucket.com/albums/h109/FullAuto_2006/CM/agfgfirstenctct.jpg Note that, due to poor visibility, the location is not exact. The sound (and bullets) is coming from that direction, but the PSW hasn't actually spotted the enemy unit. Think it might be an MG. I've got to be careful with my SPG: http://i62.photobucket.com/albums/h109/FullAuto_2006/CM/agfgspgmvup.jpg It's just a big arty gun on a tracked chassis, with armour to the front, but the top and rear left open. Even small arms fire from the rear can clear these boys out, and a grenade lobbed in it would be nasty. No MG for self-defence either. I get them to button down. In a tank, this means everyone inside, hatches closed tight. In this SPG, it means the crew crouching a little lower and crossing their fingers.